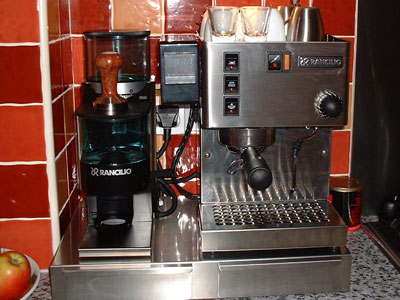
The Rancilio Silvia has attracted a loyal following amongst self-proclaimed coffee geeks, it is about the cheapest espresso machine available that is still capable of making a half decent espresso. So good is the base machine, that a relatively simple modification can improve it's consistency and seriously challenge significiantly more expensive machines.
The temperature of the brew water is a critical factor in brewing espresso, too low and the shot is typically sour, too high and the coffee will be burnt.
The decent sized boiler in the Silvia has been demonstrated by the wonderful Greg Scace to be capable of delivering a good shot's worth of water at a consistent temperature, it is this attribute that raises the potential of Silvia above similar and cheaper machines, that, in general, cannot deliver a shot's worth of water at a consistent temperature and makes the Silvia such a popular machine.
The modification aims to improve the temperature regulation of the brewing water supplied by Silvia, by controlling the temperature of the boiler. The machine as supplied uses a simple thermostat, and has a temperature variation of upto +/- 10 degree centigrade.
By replacing the thermostat with an industrial computer-based temperature controller, this variation can be brought to less than a degree after settling. This modification does involve working with mains voltages and high temperature components. If you are incompetent or unable to evaluate risk, do not perform this modification. Examples of the modification can be found here and here.
The existing thermostatic switch can simply be bypassed by replacing it with a solid-state relay (SSR) device. The SSR is then controlled by the PID controller. A thermocouple is used to sense the boiler heat for the PID controller to work from. Here's my install in stages:
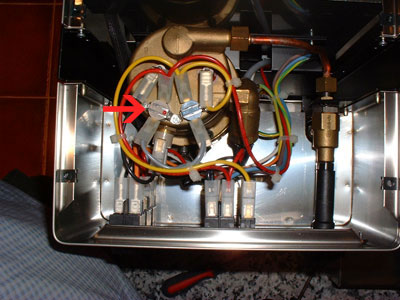
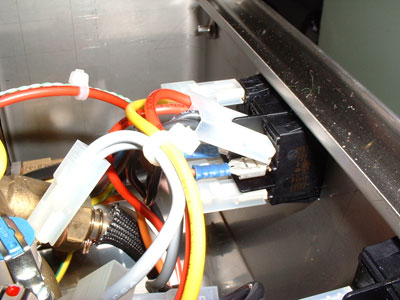
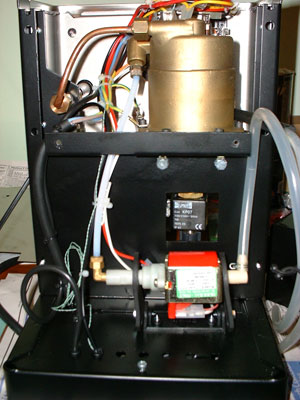
The arrow indicates the brew thermostat that will be bypassed. The other two are the steam and safety thermostats. Do not mess with these ! The two connectors are removed and you make up a pair of wires, one end terminated with a ring connector, the other with a spade connector. Use thick cable, since this is carrying the heater element current. The ring ends attach to the SSR load terminals, the spade ends insert into the two connectors you removed. Ensure that you have adequate insulation on these connectors, since the connections are close to the top panel. Do not rely on insulating tape, it will melt because of the boiler heat.
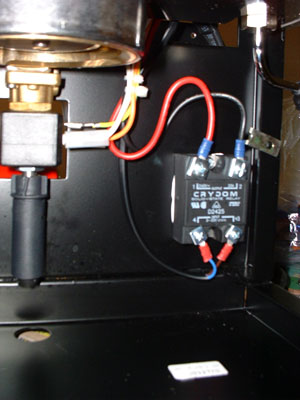
The SSR can be mounted in the empty area behind the bottom front panel:
There is one hole already there, you can drill a second one for secure mounting. As with normal sheet metal working, it is easier if you centre-punch first. The rear of the SSR should be buttered with a thin layer of heat transfer compound before offering it up to the mount:
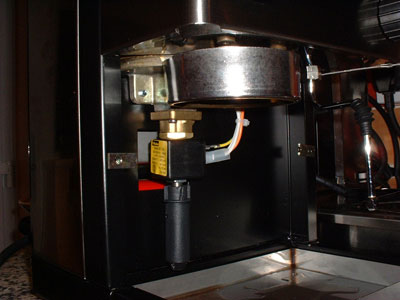
Once mounted, you make the load connections on the larger terminals. The second set of terminals carry the control signal from the PID controller. This is a much lower current, but you should still take care that the cable is protected from heat:
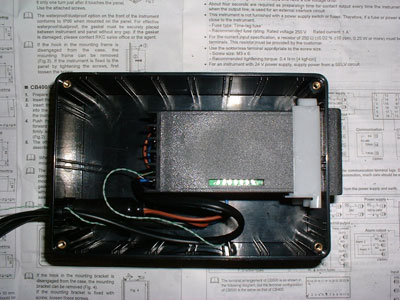
The PID controller will also need a power supply. It's much easier to use a main voltage one, take care when purchasing, since 24V is also a common option. The mains voltage can be picked up from the switched side of the main power switch by using "elbow" connectors:
I ran the cables through the rear of the Silvia, where there are some helpfully positioned holes already in the chassis:
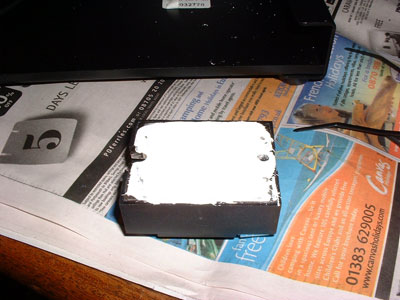
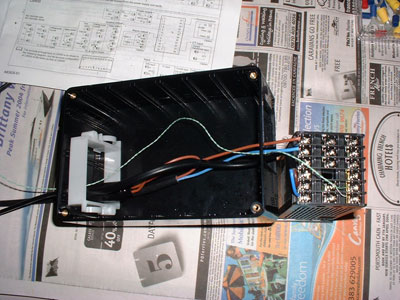
Doing it this way means that the Silvia can be un-PIDed fairly easily. The PID is housed in a pretty standard plastic project box. Take care to find a size that allows for the width of the PID controller and it's mounting bracket. It's a tight squeeze width-ways. It's a good idea to fuse the supply to the PID controller. Here you see the connections on the rear of the controller, there are three pairs of connections to make, mains supply (via the fuse), logic control to the SSR and the thermocouple:
Get it all nice and tidy before putting the lid back on. Make sure you have some strain relief on the mains cable, you can get special grommets that do this:
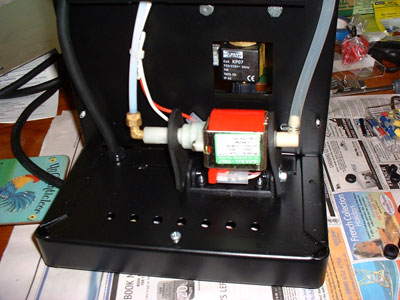
The thermocouple can be attached anywhere on the boiler. I used the heat resistant adhesive sticky thing that came with it to secure it to the top of the boiler between the element connectors:

Get all the wires tidy and zip tied neatly to keep them away from hot parts. I used spiral wrap to keep the thermocouple with the logic control cable:
Once you put all the case work back together, it will look something like this:
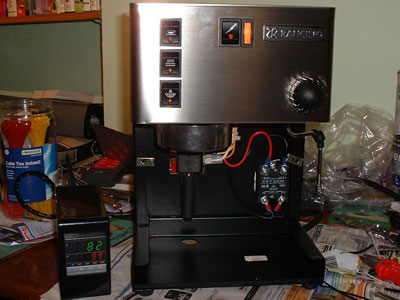
I tried using velcro sticky pads to attach the box to the side of SIivia. Over time the heat caused them to drift down the side of Silvia. In the end I removed them and just had the box on the counter-top.
Transplant to your kitchen. You will then need to set the PID controller up. Read the (probably inpenetrable) insturctions carefully. With an SSR you can set the minimum on time (pulse rate) down to a second or so. Most controllers have an autotune mode that you can use to get the controller working. You'll need to set the desired temperature somewhat higher than the nominal 98°C to allow for losses as the water passes through the grouphead. This can be found by trial and error (since it will vary for different coffee beans), my starting point was 108°C.
You can now concentrate on drinking excellent espresso !