My landing light is one of my favourites. Mainly because before I automated it I would forget to turn it on, get half way up, remember, decide to be too lazy to go down again, and then trip over something that had been left on the top step.
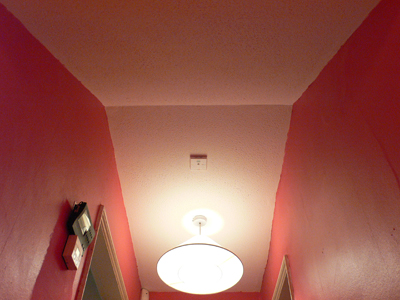
Again, I have used a PRS-001 to sense presence and light level. Originally I thought I might need to use two sensors, at the top and bottom of the stairs, but in fact the positioning shown seems to work fine, the PIR picks up from the bottom of the stairs very quickly.
The landing light is controlled by one of the LD11 DIN rail dimmers in my Node-I. For the non-cognoscenti, the LD11 is an X-10 mains controlled device, so it is not an Idratek module. Instead the Idratek system controls it via X-10 commands injected into the mains wiring via the Idratek XGW-001 X-10 gateway module.
Some people might ask "why make bl**dy great holes in the walls if you could do it over the mains wires then?". In fact, I think Tamzin probably did ask this question. One of the reasons is that the X-10 protocol is rather dated and a bit slow. However, since a DIN rail dimmer is not yet available from Idratek, I went with the LD11. The response time is slower than the Idratek direct switching, but since there is usually some light spill, it's not too much of a problem in this case.
The landing light switch was replaced with a DRB-001. In fact, only half the functionality of this module is used, the buttons and LEDs. The relays and digital inputs are unused. The Idratek range does include a "buttons-only" module, the four button QBI-001, which is slightly cheaper, but I decided four buttons would probably just cause confusion. I hope that eventually Idratek will develop a 1, 2 and 3-button only module for situations like this.
So here's the landing in the tree view, showing the directly associated modules:
Placing the DRB module (shown here as "Landing Module (2502)") into the landing object means that any button presses will also be used to infer presence, as well as execute their programmed function. Here I have programmed one of the DRB buttons to invoke the override function, which basically flips the state of the light that the automation determined:
The other effect of object containment is to support filtering when setting up functionality, initially the other objects in the container will be shown for selection, and this can then be expanded when you want to associate objects from other rooms. This is exactly what I've done in this case, since the hall light switch at the bottom of the stairs is contained in the hall room object, but I can make connections from it to the landing light object to allow overrides:
The other part of the connections dialogs relates to the default automation functions. Here the light will be affected by presence on the landing only and the light level on the landing. These could have multiple entries, but that is not the function I want to implement:
Unused here are the possible connections to cause this light to flash (perhaps for a phone ringing or door bell push) and to directly control the brightness.
The state (on/off) of the light is defined from the light object behaviour dialog. Several pre-canned options exist here, but more sophisticated schemes are possible. Here you can see the integration of presence, time and light level. This is my typical choice for most lights:
The behaviour dialog for the Light Level object is used to define "dark" in terms of an actual illumination level.
This dialog is quite similar to the temperature object used in the loft fan automation, but here there are some additions to define "dark" and "very bright" thresholds. The dark threshold is used to decide to turn the light on. The very bright threshold is used to turn the light back off, for example if natural daylight comes into the room when curtains are opened. It is important to set the very bright threshold above the illumination level achieved from the light to avoid oscillation, also known as "disco light effect".
The final part of the functionality I wanted for the landing light is to control the dimming level. During the day I want it full on, since there is no direct light to the landing. At night it must not come on at all, but at getting up time I want a gradual increase in level depending on the time. I used the overall event scheduler to set up some events that change the dim level to use:
These events do not actually turn on the light, but change the dim level that it would come on if triggered.
Another problem with many X-10 devices is that they do not provide any feedback of their state. Because of this it is important that only one thing controls their state, so that it can perform state tracking. I discovered this by accident when I enabled Cortex control of this LD11 whilst it was still wired for direct manual control by a normal light switch (i.e invisible to Cortex). Since Cortex will periodically "restate" the desired Dim level (to allow for lost X-10 packets) this had the effect of apparently randomly turning the light off. Since the light is now controlled only through Cortex, I have no problems.